Table of Contents
There is no create method in this software. The way you are supposed to create a method is by starting from an existing one and modifying as needed. MTS provides user with methods packages for different types of test. The ones available in our lab are:
- Creep, Relaxation, and One Cycle Hysteresis
- Compression
- Flex
- Peel-Tear
- Tensile
- Multicycle
There is however an Assistant to the creation of methods. I have never used it, so I would not be able to recommend it to anyone. It is in the Define upper tab, Assistant left tab.
1. Set up
- On the TestWorks startup screen, Go to Method > Open method.
- Choose from the templates the test that is closest to what you want. It is important to get the closest one, it is not necessarily possible to program a clean cycling test from a simple tensile test method.
- Save it with a new name in YOUR folder right away. Go to Method > Save Method As
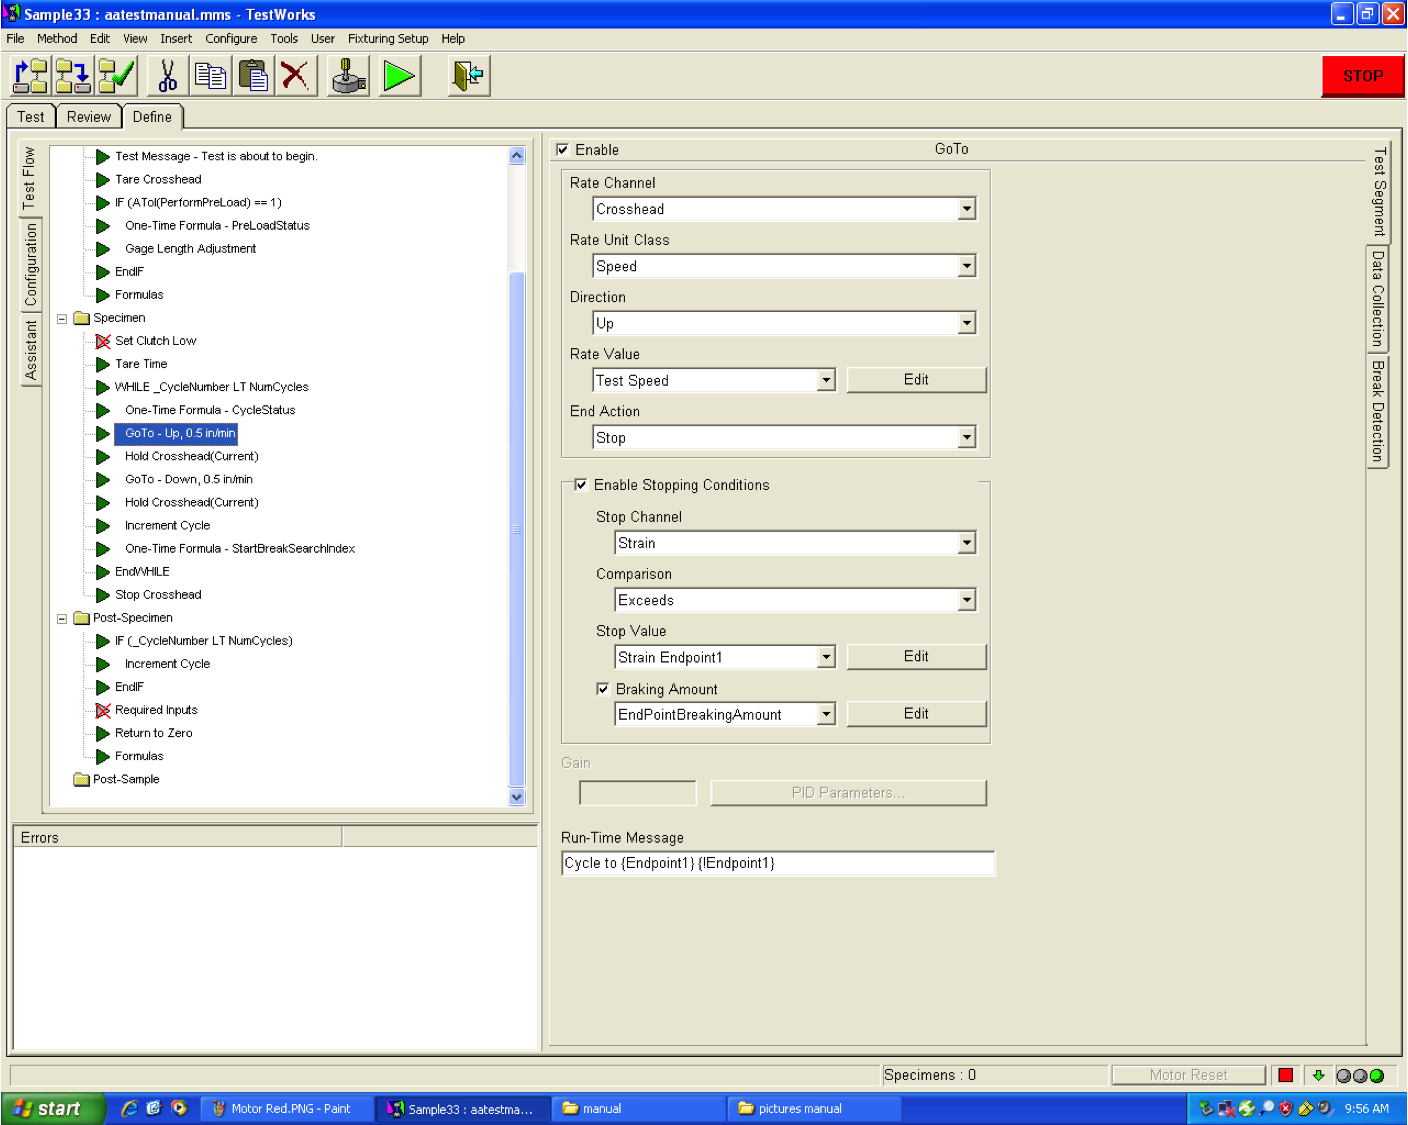
- The software has 3 main upper tabs: Test, Review, and Define (see picture below). As expected, the creation of a new method happens in the Define tab.
2. Test Flow
- There are now three tabs on the left of the screen: Test Flow, Configuration, Assistant. Make sure you are in the Test Flow tab (see picture above). You should see all the steps (called segments) of the test on the left of the screen and, when you click on one segment, the properties of that segment on the right of the screen. Note that the right part of the screen also has three tabs now: Test Segment, Data Collection, and Break Detection.
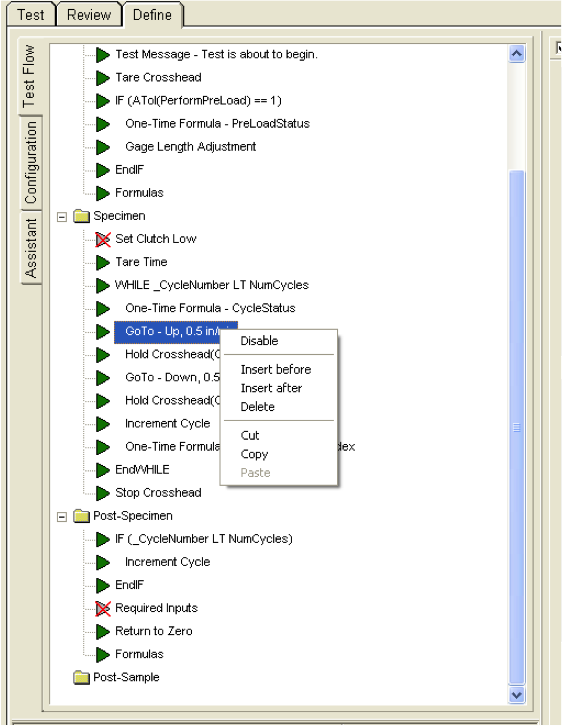
- At this point, the software is pretty much self-explanatory. Your goal is to insert/delete/disable/modify segments until you set up the test you were aiming for. To modify, click on a segment and change the properties on the left. To insert, disable, or delete, right click on the segment. Use the manual or the software help in case of doubt.
<fc #4682b4>Here are the tricks of the trade: a few points you should be careful about and that can ruin your test.</fc>
Variable creation or modification in Configuration
- One of the trickiest thing to do in TestWorks is to properly create a variable. For that, leave Test Flow and go to Configuration left tab. In this tab, you can see all the variables of the method, sorted in categories.
- <fc #4682b4>DO NOT touch the channels variables.</fc> You will probably break the method since those are either the signals from the hardware or needed computations for the controls.
- The formulas are mostly useless to me since I tend to post-process raw data myself in Matlab. I would not necessarily trust a Young's modulus given directly by the machine.
- Now the interesting part: the <fc #4682b4>inputs</fc>. In this folder, you can either add a variable or modify one. For example, if you need more than 2 strain endpoints, copy and paste Strain Endpoint 1. The software will ask you for an internal name (no space).
- Once the variable is copied, in the bottom right quarter of the screen, you can pick all the characteristics of the variable, such as display name, units, default value.
- Make sure the limits correspond to what you want.
- Important: In options you decide where this variable will be input. If you do not chose anything you won't be able to modify that variable from the default value. Required input means that a screen will appear each time you press play to start a test. (I do not know about you but that drives me nuts.) I would recommend to chose <fc #4682b4>panel input</fc> for all the variables you want to manually control before each test. This will put the list in the upper right quarter of the screen in the Test upper tab (you can check right away). Then before starting a test, you go through the whole list and you are done.
- You can now use this variable in the segment characteristics of your test flow.
Data Collection
- For each segment, click on the <fc #4682b4>Data Collection</fc> right tab and make sure it is enable! Otherwise, you will perform a perfect test but recording no data.
- Make also sure the data acquisition rate you are planning to use makes sense regarding the length of your test and the load and displacement rates you are programming.
- Finally, at the bottom of the Data Collection tab, there is a section called <fc #4682b4>Buffer</fc>. This section can make your life hell. You must input a buffer size for this segment specifically. The buffer size can be calculated from the duration of the segment (or an approximation) and the data acquisition rate. Don't forget to add a margin!
- When the buffer reaches a maximum, the smartest thing to do not to lose any data is to use the Fold and reduce data rate option in the Buffer Full Action menu. Other horrifying options include stopping the whole test, going directly to the next segment, or removing all points at the beginning of the segment to add them to the end.
Note: Fold and reduce data rate means that if your buffer size is too small, the software will remove every other point from the first part of the test and will keep recording data at a lower rate for the time being (until the limit is reached again). At least, all the parts of the segment are recorder. BUT you will end up with segments with varied data acquisition rate which can be problematic if the data acquisition rate is not high enough for the phenomenon you wanted to observe and can make post processing tricky.
CAREFUL <fc #4682b4>The machine limits the number of points per test.</fc> Obviously considering the impact of a buffer size that is not large enough, you could try to just put a high value in each buffer and run with it. First, what seems a high number to you might actually not be high enough depending on your data acquisition rate. We tend to underestimate the number of points resulting from a test. Second, if the total of all the buffers is actually too high, the machine just stops recording! It will record the first segments that fit into the limit, pursue the test as if everything is fine, and once you export your data, you realize that you are missing most of your test. so try to estimate properly the buffer size you actually need.
Break Detection
- Next, go to the Break Detection tab. If you are expecting large load changes in small time, which can mimic a break (you should not but …), make sure to disable the break detection or to change the threshold values otherwise the test will simply stop.
3. Exporting data
The last part of every method is instructions to export the data that you want. This is less of a problem than the data acquisition because you get as many do-overs as you want: these instructions can be changed after the test to export the data again. I will here describe to you the method I use, definitely not the only possible one, but this one works and allows me to save the raw data text file wherever I want to.
- Go to left tab Configuration > Specimen Export
- in Export Template, click Browse and choose MTS Export All with tabs.txt
- in File Mode choose Sample Name - Append to prevent the software from overwriting any test file.
- if you have data to export you can check the format by going to File > Export Preview > Specimen. Notepad will open a text file with all your data.
Note: if you are planning to use the Matlab function available on the wiki to read your text file, make sure you save one test per text file, the function will only read the first one and the bash script will crash. To do that, always save a specimen and not a sample (all specimens of one test).


